Siteimprove’s Jira Connector
Answer
Siteimprove's Jira Connector allows customers using Jira Software Cloud and Jira On-prem (private installations) to connect their Siteimprove subscription to Jira so that issues found by Siteimprove can be reported directly into Jira for tracking and project management.
Overview
Jira is a platform that provides issue tracking and project management functions for software projects.
For customers using Jira Software Cloud and Jira On-prem (i.e. private installations), we provide the ability to connect your Siteimprove subscription to your Jira account. This allows you to report issues found by Siteimprove directly into the issue tracking tool.
Notes
- Admins/Account Owners are able to manage the JIRA settings from the Integrations menu.
- The default user role in the Siteimprove platform cannot manage the JIRA connection settings, but can create/manage Jira issues. To do so a Jira connection and Jira user (marked as shared) should be created by an Admin/Account owner.
- After you set up the connection, you must Configure Jira task templates.
- This integration currently supports only Company-managed software (Classic) and not Team-managed software (Next-gen) Jira project types.
- Siteimprove is happy to help with questions regarding configuring the integration. Siteimprove does not provide support or product help for the third-party software with which you are connecting.
Self-Managed Jira Connections (OAuth 2.0)
How to configure your self-managed Jira connection with OAuth 2.0
In order to link Siteimprove to JIRA On-Prem (private installations) follow the steps in this article.
- Follow the instructions here: Configure your self-managed Jira connection.
Jira Cloud Connections
How to add a Cloud Jira connection
- To link Siteimprove to JIRA, go to Integrations > Task Management > Connections.
- Select Connect to Jira (or "Add new Jira connection" for an additional connection)
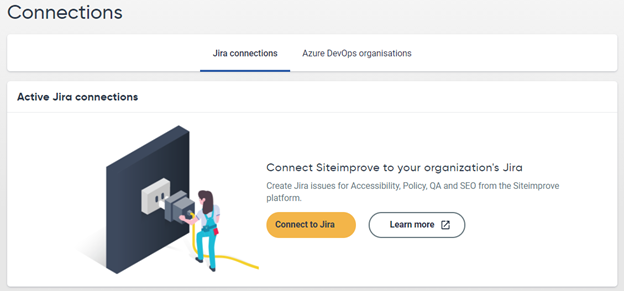
- Enter the following details:
- Connection name: A name for this new Jira connection.
- Base URL: The JIRA Cloud instance URL, e.g., https://example.atlassian.net
- Afterward, you will need to add a Jira connection user.
Jira Connection Users
How to add a Jira connection user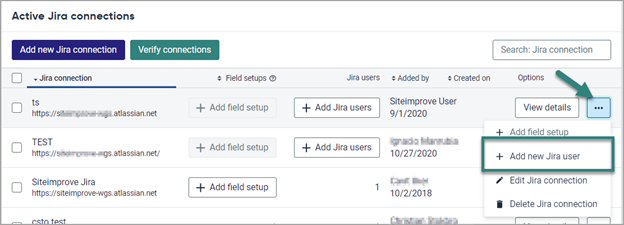
- Setup a Jira user in your Jira instance for this integration and note the Name and Email for later use in the setup.
Note: When setting up the Jira user to be used for the Jira connection, we recommend that you create a generic Jira user (i.e. not tied to an actual person). You could name it something like 'siteimprove_integration,' and give that Jira user permission to create/read in the relevant projects within your Jira instance. Please ensure this user is assigned to a Company-managed software (Classic) project type. This integration currently supports only Company-managed software (Classic) and not Team-managed software (Next-gen) Jira project types.
- Create a Jira API token by following the steps in this article: How to create an API token from your Atlassian account.
- Go to Integrations > Task Management > Connections
- Select Add new Jira user via options under the 3-dot (ellipse) icon drop-down next to the connection listing.
- Enter the details of the Jira account user, including Name, Email, and Jira API token.
- Select the access level required, i.e., shared or only you
- Click the Add account button
Jira Task Templates
Configuring Jira task templates
Once you have set up the Jira connection, you will need to configure the Jira Projects and Issue Types (Bugs, Tasks, Epics, Story, Sub-task, etc). This is so that they can be available to create Jiras via the Siteimprove platform.
If this is not set up, then the fields for the projects you want to add Jira’s for will not be visible when creating Jiras. For more details, see this article: How to map and configure fields in a work item/task template.
Once this has been configured users can start to create Jiras. Read more on this in the article How to create Jiras from within the Siteimprove Intelligence Platform.
Did you find it helpful? Yes No
Send feedback