Siteimprove Email Governance Integration Installation and Usage Guide
Summary
Siteimprove Email Governance integrates Prepublish content checks directly into leading email platforms, letting you check emails for accessibility, quality, and policy compliance before they're sent. To use it, install the browser extension (Chrome, Firefox, or Edge), then launch it inside your supported email platform to run a Prepublish check on your email in preview mode. You'll need a Siteimprove account with an Email Governance subscription and one of the supported email platforms.
Prerequisites
- A Siteimprove account with an Email Governance subscription (if unsure, contact your Siteimprove representative or the support team)
- One of the supported email platforms: Adobe Campaign, Salesforce Pardot, Marketo, HubSpot, or Optimizely Campaign
- A supported browser: Google Chrome, Mozilla Firefox, or Microsoft Edge (Safari support upcoming)
Overview
Siteimprove Email Governance integrates Prepublish content checks directly into leading email platforms, ensuring your emails meet accessibility, quality, and policy standards before being sent.
Platform Compatibility
Siteimprove Email Governance supports multiple major email platforms, including:
- Adobe Campaign
- Salesforce Pardot
- Marketo
- HubSpot
- Optimizely Campaign
Prerequisites for Installation
To use the integration, you must have a Siteimprove account with an Email Governance subscription and you must be using one of the supported email platforms above. If you are not certain whether you have an Email Governance subscription, please reach out to your Siteimprove representative or to the support team.
Installation Guide
To use Siteimprove Email Governance, install the browser extension for your preferred browser.
- Google Chrome: Install from the Chrome Web Store.
- Mozilla Firefox: Install from the Firefox Add-ons Store.
- Microsoft Edge: Install from the Edge Add-ons Store.
- Upcoming support: We're working on adding support for Safari.
During the installation of the browser extension, you may be prompted to pin the browser extension if you haven't already, which we recommend, and to explore key features of the extension. Select the "Continue" button to move through these steps and complete the installation. 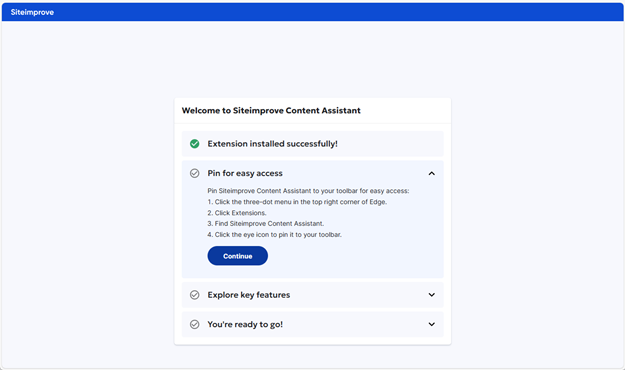
You are now ready to use the Siteimprove Email Governance tool within your email platform. Follow the usage guide below for how to use the integration.
Usage Guide
Once the extension is installed, follow these steps to analyze and optimize your emails. These example screenshots are shown using Marketo for demonstration purposes, so your email platform may look or behave a bit differently. The basics of this integration should work similarly for the other email platforms, though.
- Log in to one of the supported email platforms (Adobe Campaign, Salesforce Pardot, Marketo, HubSpot, or Optimizely Campaign).
- Log in to your chosen email platform as needed.
- Create or edit an email — Open the email you want to analyze and ensure it is in "preview" mode.
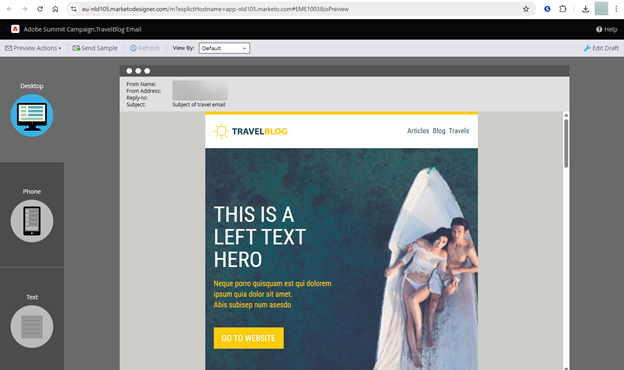
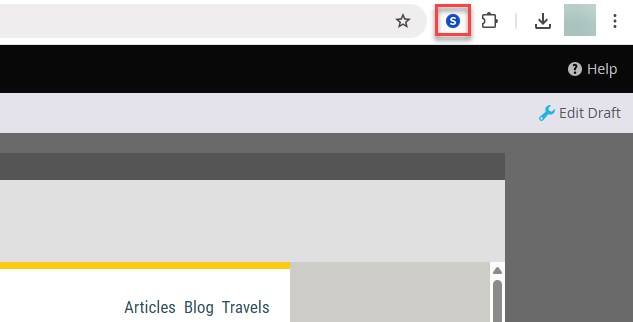
- Launch the Siteimprove extension — Click the Siteimprove icon in your browser toolbar to open the Siteimprove Content Assistant browser extension. If you are not logged in to your Siteimprove account, you will be asked to log in to your Siteimprove account.
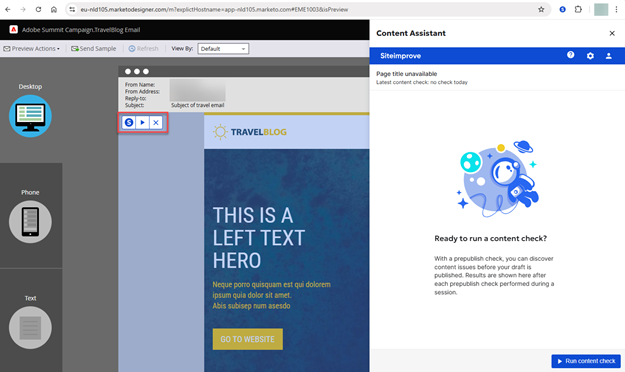
- Siteimprove's logo will now appear in a tab on the right side of the Preview window, and a blue overlay will appear over the preview area along with a widget in the upper left-hand corner of the preview window with a Siteimprove Logo button, a play button, and an "x" button inside it.
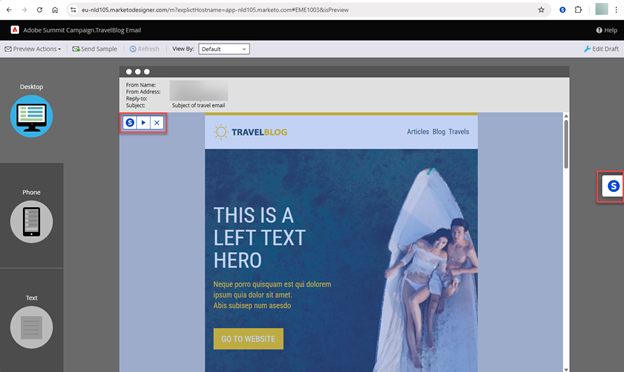
- You can now open the Siteimprove integration by clicking the Siteimprove logo in the tab to expand the side panel (aka overlay) and selecting the "Recheck page draft" button at the bottom of the side panel.
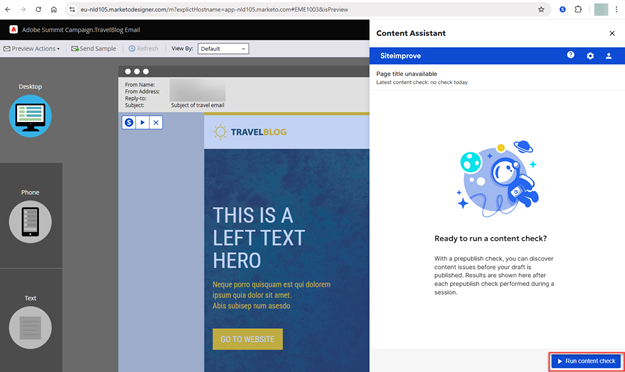
Using the Preview Area Widget
Optionally, you can also use the widget in the preview area to complete the following tasks:
- Siteimprove logo button = toggles the side panel (aka overlay).
- Play button = runs a check of the content (like when you select the "Run content check" or "Recheck draft" buttons in the side panel (aka overlay)).
- x button = closes the side panel or removes the blue overlay and widget from the preview area.
When you select the option to run a check, a processing loading bar will initially show in the side panel as Siteimprove analyzes the content in the email preview area using a Prepublish check. 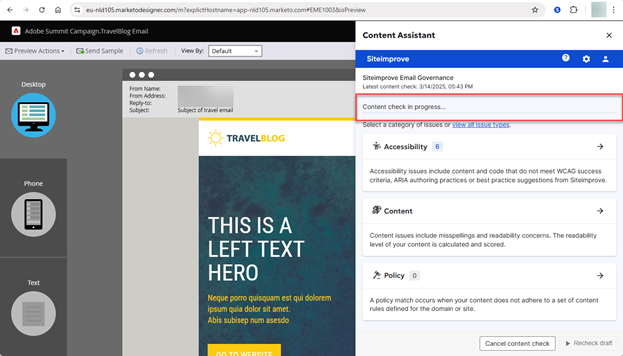
Once the check is completed, insights and suggestions for optimizations will be displayed in the side panel. 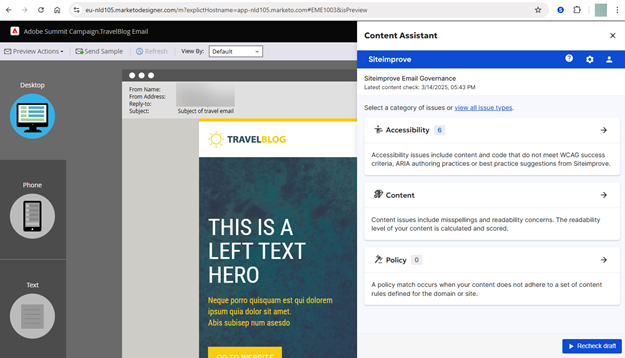
You can expand the sections and highlight issues that are highlightable in the preview area. 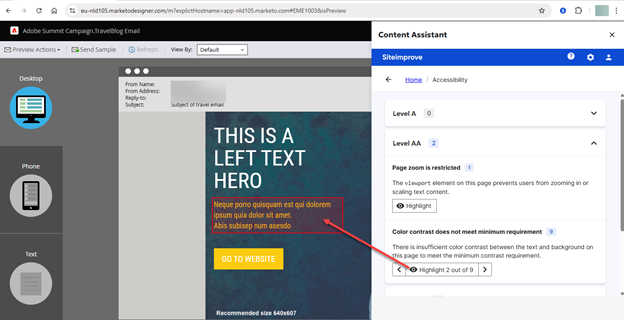 You can also select the link that says "view all issue types" to change the view in the side panel to a different "List view" type.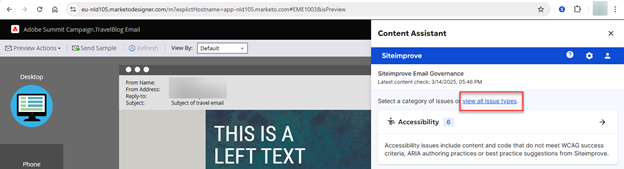
"List view" type in the browser extension. 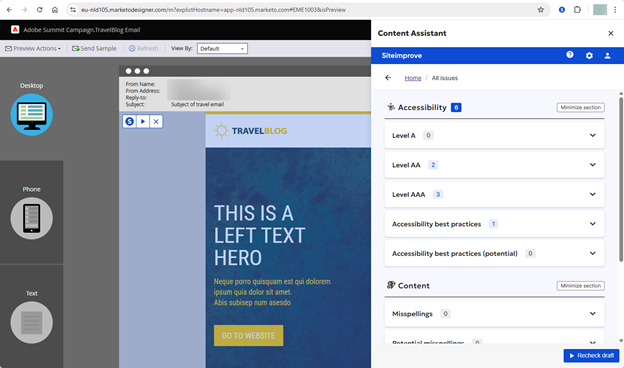
You can then review your content, make the relevant changes based on the results, and run another recheck of the draft of the email content using the "Recheck draft" or play button. 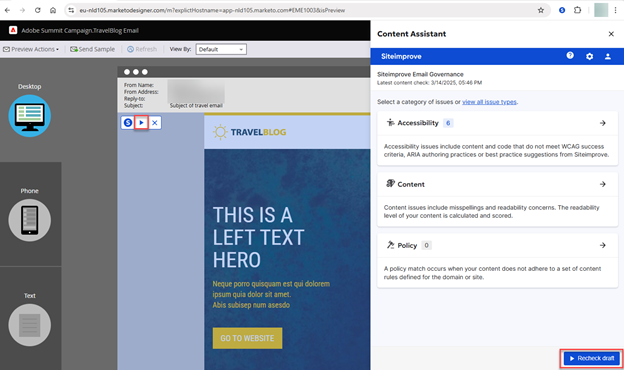
Additional Notes
Siteimprove can help with integration configuration and the basic usage described above. However, Siteimprove does not provide product support for the connected third-party software.
Did you find it helpful? Yes No
Send feedback